The Comprehensive Guide to Leather Strap Finishing Without an Edge Beveler
Introduction:
Welcome to our detailed tutorial at TheCopperBuckle.com, tailored for enthusiasts who wish to master the art of leather strap finishing without the use of an edge beveler. This method focuses on utilizing sandpapers, water, gum tragacanth (gum trag), Tokonole (tokenol), and a wood multi-size edge slicker. Let’s dive into the step-by-step process that ensures every leather strap you work on emerges with a professionally finished edge.
Step 1: Initial Cleaning
- Begin with a Clean Slate: Ensure your leather strap is free from dirt and oils. Wipe it down with a slightly damp cloth and let it dry completely before proceeding.
Step 2: Sanding the Edge
- Start with Coarse Sandpaper: Using 220-grit sandpaper, sand the edges of your leather strap to knock down any high spots and to round off the edges slightly. This creates a uniform surface for further refinement.
- Move to Medium Grit: Switch to a 400-grit sandpaper to further smooth the edges. This intermediate step removes the scratches left by the coarser grit and prepares the leather for finer finishing.
- Finish with Fine Grit: Finally, use an 800-grit sandpaper for the ultimate smoothness. Sanding in one direction helps create a uniform finish.
Step 3: Choosing Your Finishing Material
- Water, Gum Trag, or Tokonole?: Decide on your preferred finishing material. Water is the simplest method, gum trag offers a natural finish that penetrates deeply, and Tokonole provides a glossy, protective layer.
Step 4: Applying the Finish
- Application Technique: Apply your chosen material using a clean cloth or sponge. For water, dampen the edge without saturating it. Gum trag should be applied in a thin layer, allowing it to soak into the leather. Tokonole, being thicker, requires a sparing application to avoid buildup.
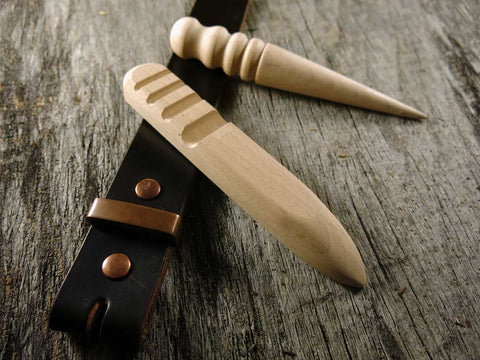
Step 5: Burnishing with a Wood Slicker
- Burnishing the Edge: With your wood multi-size edge slicker, briskly rub the treated edge. This generates heat through friction, melding the finishing material into the leather and compressing the fibers for a smooth, polished look.
Step 6: Intermediate Sanding (Optional)
- Refining the Edge: If the edge isn't as smooth as you’d like after burnishing, lightly sand it again with 800-grit sandpaper. This step is optional but can enhance the smoothness before the final burnishing.
Step 7: Final Application of Finish
- Second Coat for Perfection: Apply a second, light coat of your chosen finish. This layer ensures an even coverage and prepares the edge for the final burnishing, locking in the smoothness and shine.
Step 8: The Final Burnish
- Seal the Deal: Use the wood slicker once more to thoroughly burnish the edge. This final pass should be vigorous to ensure a sleek, professional-grade finish.
Step 9: Waxing for Durability and Shine
- Applying Wax: Lightly apply a leather finishing wax with a soft cloth. This step is crucial for sealing the edge against moisture and wear, providing a durable and slightly glossy finish.
- Buffing to Shine: With a clean, soft cloth, buff the waxed edge to your desired level of shine. The more you buff, the glossier the edge will become.
Conclusion:
Congratulations! You've successfully finished your leather strap with a professional edge, without the need for an edge beveler. This process, while meticulous, rewards you with a durable and aesthetically pleasing leather piece.
At TheCopperBuckle.com, we're passionate about empowering our community with the knowledge and skills to elevate their leathercraft. Whether you’re a beginner or an experienced artisan, mastering these techniques opens up a world of possibilities for your projects.
